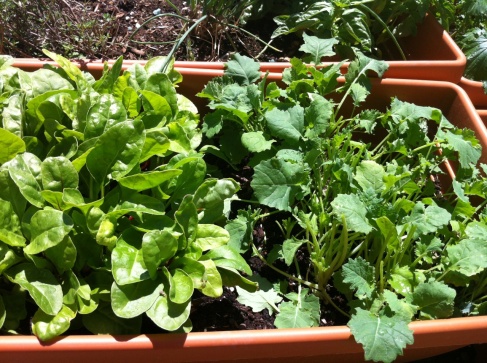
I have to admit I wanted to write this earlier today, but I’ve been distracted by my garden all afternoon. I’ve been transplanting, weeding, pruning, planting, and talking to my seedlings because I’ve heard that makes them grow faster (or that’s just my excuse for talking to myself). I was pleased to see immature tomatoes, bell peppers, and jalapenos making an appearance.
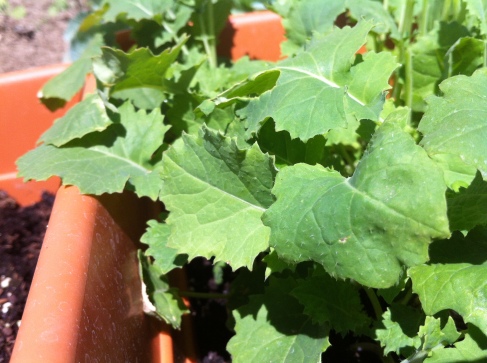
Two of the vegetables I’m growing in my garden this year for the first time is Swiss Chard and Kale. Last spring break I visited my aunt in Santa Barbara, California and we tried out kale chips for the first time together. They were delicious and a bit healthier than other salty snacks like potato chips. Once I got a hold of my own kale, I realized I could enjoy kale chips made at home. Not only are the kale chips homemade, but they are even healthier than packaged kale chips found in grocery stores because I know exactly where the ingredients are coming from, and they don’t contain extra ingredients and preservatives.
I’ll admit, my home-grown kale probably isn’t mature enough to make large batches of kale chips, but I just couldn’t wait. Before using my clean, sharp kitchen shears to harvest my kale, I looked up a few different kale chip recipes to get different flavor possibilities. I decided on the three following flavors: chili lime, lemon pepper, and salt & vinegar.
Some of the other flavors I stumbled upon included roasted garlic, creamy dill, balsamic vinegar, french onion, soy & sesame, along with cheesy black pepper. I’ll post the recipes for each below if you’re feeling creative. But first, I’ll give you the kale chip basics.
After harvesting or purchasing your kale, gently rinse and dry the leaves thoroughly. I skipped this step because I know my kale came from a pesticide and herbicide free garden. If you do plan to wash your kale be sure to get each water particle off every piece, otherwise you will likely end up with soggy chips. After drying, place your bite-sized kale into either a large bag, or roomy, lidded Tupperware. Add olive oil, and shake to cover leaves. The next step is to add any seasonings or flavors, and the spread out chips evenly on a baking sheet. In a 350 degree oven, bake till crisp for about 10 minutes, and enjoy.

As I mentioned above, I tried out the chili lime, lemon pepper, and salt & vinegar flavors. Our family favorite was the lemon pepper, with salt & vinegar a close second. Also, I’d like to say the last photo is unfortunately not taken by me, because the chips seemed to disappear before I could snap a picture.
Thanks to Womens’ Health and Refinery 29 for these adventurous flavor recipes:
For each, you can either add the ingredients to the bag to shake up, or sprinkle on before baking.
Lemon Pepper: sprinkle oiled chips with lemon pepper seasoning
Salt & Vinegar: 1 quarter cup sherry vinegar (I used rice vinegar) + 2 tsp fine salt
Chili Lime: Juice of 1 lime + 1 tsp lime zest + 2 tsp chili powder
Balsamic Vinaigrette: 3 tbsp balsamic vinegar + 1 tbsp Dijon mustard + 2 tsp Herbes de Provence
Roasted Garlic: 3 cloves garlic, finely chopped + 3 tsp garlic salt
Creamy Dill: 1 tbsp sour cream mixed with base olive oil + 3 tbsp fresh dill, chopped
Soy & Sesame: 2 tbsp soy sauce + 1 1/2 tbsp sesame seeds
French Onion: 1 packet (or two tbsp) french onion dip or soup mix, combine with olive oil
Cheesy Black Pepper: 1 tsp extra-virgin olive oil + 1/4 cup (loosely packed) shredded white cheddar cheese + 1/8 tsp freshly ground black pepper
I hope you get a chance to try a few of these out. If you do, let me know which flavor is your favorite!

